.jpg)


Granny Square Crochet Top
- rachelbevis
- Oct 22, 2022
- 3 min read
Updated: Oct 24, 2022
Inspiration: Chenda DIY
I used her work as inspiration but changed different things compared to hers.
Level of difficulty: Beginner
Supplies:
- 5 mm crochet hook
- 4 x 50 grams of 8 ply yarn in 4 colours
- 100 grams of 8 ply yarn in base colour
Stitches:
- Chain stitch (ch)
- Chain space (ch-sp)
- Double crochet (dc)
- Slip slitch (sl st)
- Stich(es) (st(s))
- Single crochet (sc)
- Front post double crochet (yarn over, insert hook into front to back to front around the post of the next stitch, yarn over, pull through first loop, yarn over, pull through the first 2 loops on hook, yarn over, pull through remaining 2 loops on hook) (fpdc)
- Back post double crochet (yarn over, insert hook into back to front to back around the post of the next stitch, yarn over, pull through first loop, yarn over, pull through the first 2 loops on hook, yarn over, pull through remaining 2 loops on hook) (bpdc)
Granny Square:
Round 1
1. Ch 3. This counts as the first dc st of the first granny cluster.

2. Into the first chain, work 2 dc. This should look like 3 dc next to each other. This is the first granny cluster. Ch 3.

3. Make the second granny cluster. Into the centre ring, work 3 dc. Ch 3.
4. Make the third granny cluster. Into the centre ring, work 3 dc. Ch 3.
5. Make the third granny cluster. Into the centre ring, work 3 dc. Ch 3.

6. To make the square shape, sl st into the first ch-3.
Round 2
Change colour

1. Chain 3. Below in the space where you ch-3 (corner) work 3 dc, ch 3, 3 dc
2. Ch-1 space. Into the next ch-3 corner space, 3 dc, ch 3, 3 dc.
3. Repeat step 2 twice more for a total of 4 corners.
4. Ch 1 and join with a sl st to the 3rd chain of the beginning chain stitches.

Round 3
Change colour

1. Chain 3. 2 dc, ch 3, 3 dc, ch 1
2. Into the next ch-1 space, work 3 dc, ch 1
3. Into the next ch-3 space, work 3 dc, ch 3, 3 dc, ch 1
4. Repeat steps 2 and 3 until you get around to the beginning chain. Sl st at the top of starting ch-3.
Round 4
Use base colour (white)

1. Ch 3, 2 dc, ch 3, 3 dc, ch 1
2. Into the ch-1 space work in 3 dc, ch 1
3. Into the next ch-3 space work in 3 dc, ch 3, 3 dc, ch 1
4. Repeat steps 2 and 3 to all of the remaining ch-1 and ch-3 spaces
5. Join with a sl st to the top of the starting ch 3
6. Cut the yarn.
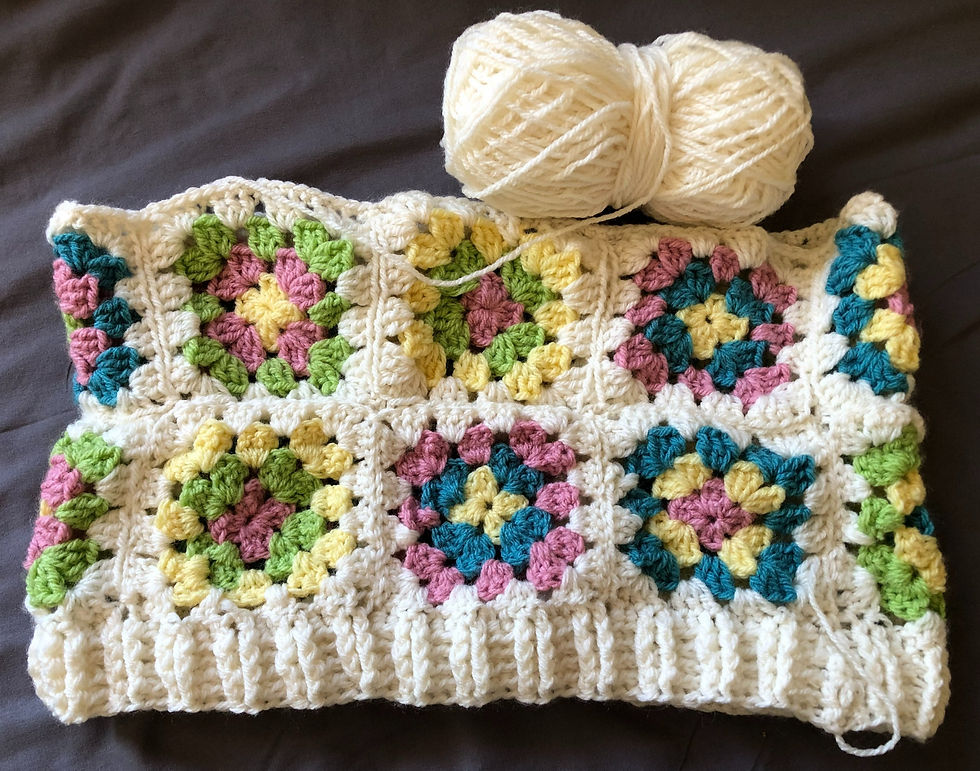
I crocheted 16 granny squares, but add more to change the length and width.
Make sure to weave in the ends.
Joining the Granny Squares
The order that I joined them together was the pairs horizontally, then made the panels and joined those together.

Face the "right" sides of the squares together.
1. Join the yarn to the corner of both squares with a slip slitch.
2. Insert hook into the two outer loops.
3. Yarn over and pull through both loops.
4. Keep repeating step 2 and 3 until you have gottent to the end of the line.
Weave in ends.
Waist Ribbing
Attach the yarn into the corner part of the square (attach into third dc), ch 2
Row 1:
a. Yarn over, insert hook into same loop with chain 2, insert hook into first double crochet across from seam, yarn over and pull through both dc loops, yarn over, pull through 2 loops, yarn over, pull through 2 loops (decrease).
b. Then dc into each stitch until you get to the other side of the top.
c. When you reach the corner on the other side of the top decrease again.
d. Dc in each st until the end of the row, sl st
Row 2-5:
Ch 2, dc, fpdc x 2 (explained in stitches section), bpdc x 2 (explained in stitches section), repeat into each st until one last st, dc, sl st to ch 2
Repeat for rows 2-5 and then cut ends.
Single Crochet Around Top Edge
Row 1-3:
Sc into each stitch until end of row.
Crochet Strap
Use stitch markers and mark where you want to put the strap.
Attach yarn and ch-1
Row 1:
Sc x 8
Row 2:
ch 1, turn, sc x 8
Repeat row 2 until you finish row 46
Row 47:
Flip work and sc both sides together, slip stitch, ch 1, cut off yarn
I hope you enjoy making this tank top! Of course, all of the measurements can be altered by changing the number of rows or granny squares.
Finished product!!

xoxo, Rachel

Comments